WHAT IS THE SOLUTION TO DEAL WITH SLOW CURVES AND BENDS? LET’S STEAL IT FROM THE OFF-ROAD MOTORCYCLES!
Welcome to my technical column! We have come a long way together so far: riding position, driving psychology, use of sight, braking and medium-fast cornering technique. I guess we have removed many doubts! However, I haven’t explained to you something you ask me very often… that’s right, dear Misses, I’m finally talking about hairpin bends and standstill maneuvers!Well, today is the day. I will explain how to deal with slow curves and maneuvers at low speed, and to do so we will take many examples from a field that many motorcyclists do not know: off-road motorcycles.
CURVES AT LOW SPEED SCARE ME, I FEEL LIKE I’M FALLING
Good! If you feel like you’re falling, it means that your senses are working. There is a solution, though! We’ll get there soon, but we need first to understand a couple of simple concepts. What happens when cornering on a motorcycle, in fact, depends on the speed at which we travel. Our gyroscopes (the wheels) tend to give stability to the bike the faster we go, and from a certain pace we could take our hands off the handlebars and the bike would still go straight. Right? But not only that! The faster the bike goes, the more effort we’ll have to make to convince it to turn: in a corner, the bike’s “instinct” would be to go straight, if we don’t convince it to turn.

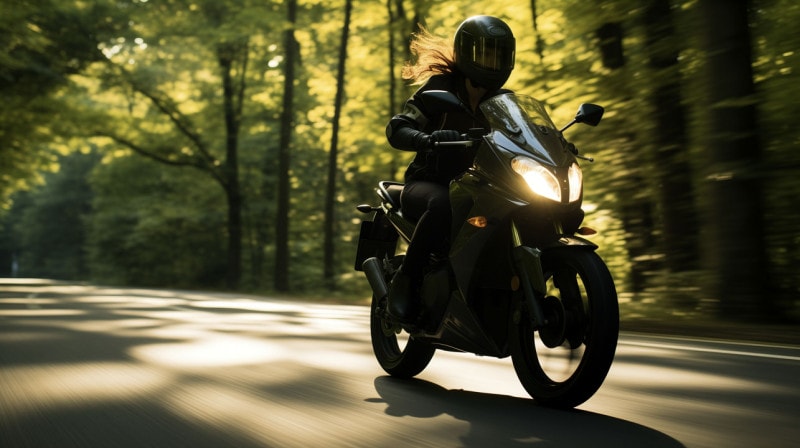
So, what is going on? When cornering, at medium-high speeds, the dominant force on the bike dynamics is centrifugal force. It drives us out. We counteract it by leaning and bringing the upper-body inside the curve, very steady on our legs that are adhering to the bike (for the complete technique, check out the article Let’s explain leaning) as you can see me doing in this picture.
Now, why is it that when we maneuver at low speed, or in some corners such as slow hairpin bends, we seem to fall inside instead of being dragged out? The key lies precisely in the travel speed, which is not high enough to generate enough gyroscopic force (and therefore centrifugal force). At medium to low speeds, the force of gravity takes over. It takes us to the ground. We always have to lean to corner, but the technique we used is no longer enough for us. We need to counter resisting forces with a different technique. Let me introduce you to…
THE ENDURO SETTING
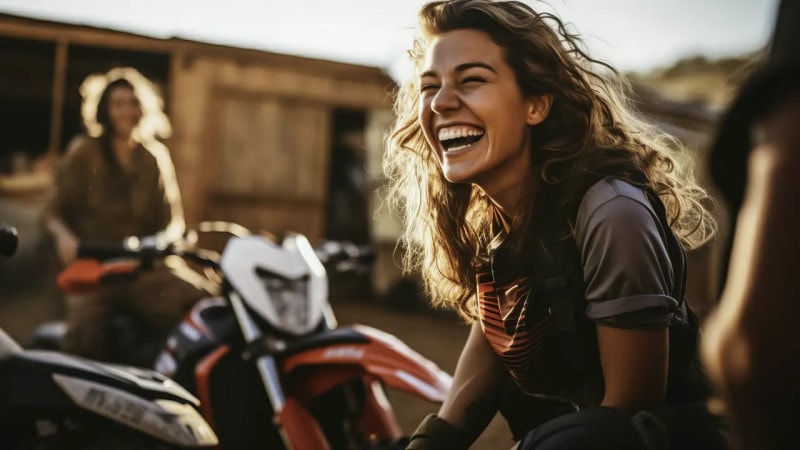
In the picture above you can see me reviewing some of the basics of off-road motorcycles. My favorite discipline remains speed, but I can’t explain in words how much off-road driving has helped me improve my driving, both on the road and on the track.
If you haven’t done it yet, take a basic enduro or motocross course. It opens up a world for you: you will get used to driving safely on imperfect surfaces, which are constantly changing, where curves take place at an extremely limited speed and soil is soft. You’ll get used to developing your balance, in addition to having a super hot body.
But let’s get back to the point: the technique used to take a curve in enduro consists of leaning your upper-body to the outside of the bike rather than inside. You know when you are sitting with your motorcycle on the stand, right? You are doing it without thinking about it: your bike is in fact tilted, but you are perpendicular to the ground. That is, if you were in a corner, you would be outside the bike.
The purpose? Counteract the force of gravity. In this picture you can see me with an enduro position, but on the road and on a road bike (picture below). To tell the truth, this is only one of the cornering techniques used in enduro, but for road purposes it is the only one that matters to us.
Did you know that this corner technique also exists? In my experience, for the vast majority of motorcyclists the answer is “no”.
I also include myself: before someone explained to me that there was a suitable position for slow maneuvers and that it was totally different from the classic one, I tried what most like all of you did: I tried to lean in the usual way, I was getting scared and I ended up thinking that tight hairpin bends and maneuvers when standing still were “dangerous experiences”. Instead, like any aspect of riding a motorcycle, there was an explanation.
And how low is this speed? Where is the limit? Let’s say from 30km/h down, but you’ll see that there is a speed range where you could effectively use both techniques to take a corner. The important thing is to know that, if you go faster, the technique with an inner upper-body will absolutely be needed and if you go really slow, the one with the outer upper-body will definitely be needed.
And now let’s learn it well together.
THE TECHNIQUE EXPLAINED
As usual, let’s start from the bottom:
As you can see, the difference with the technique for medium-fast corners is in the upper-body (which is forward on the outside) and in weight balance, mostly on the outside footpeg (even if we push on both of them).
Moreover, in slow corners it is the outside elbow that is up, instead of the inside one, but if you think about it there is no difference: elbows must be wide and up, on the same level. When you move your upper-body forward, your elbow stays up on that side. Compare the two photos to understand what I’m talking about.
So, in short, there is a technique that can soothe your hairpin corner anxiety! Hooray! Now let’s practice it and understand all the ways we can help the bike turn slow.
OUT OF THE COMFORT ZONE
I know many motorcyclists who say they know how to go fast, but almost none of them know how to go slow. And often even the ability to go fast is actually overestimated… but for most people going slow is more scaring than going fast. Why?Because there is less stability. The truth is that it takes little time on a motorcycle to find a comfort zone: that speed around 60-90km/h at which the motorcycle is fast but not too fast, it is stable, it does not want to throw us on the ground or even off the road. Many people get used to driving in this comfort zone, but they don’t understand that they are giving up on developing their driving skills: in fact, what happens if you take a 60 km/h corner at 90 km/h? The absolute speed wouldn’t be terrifying, but in a corner like this it suddenly becomes high, and it takes a lot of ability to handle the bike. Do we know how to do it? If you have studied the previous articles, and done some practice, you will have noticed that, if we have control over the bike, we are confident and we anticipate actions with our mind and eyes, many turns that seemed difficult to us will suddenly become within our reach. Our driving skills have increased. So how do we improve? Just leaving the comfort zone, studying and practicing on the bike. If you have tried to work on your braking technique, cornering needs the same effort.
It is therefore time to make a new effort and work on it with our skills at low speed: find an area closed to traffic (a parking lot of a supermarket closed on Sundays, for example), if you have cones, bring them and get down to it!
PRACTICE LEADS TO PERFECTION
As usual, remember that no one is chasing you: let’s start with the easy things, those that you can already do. I would never ask you to jump into the rapids and swim.
An excellent exercise to get familiar with the enduro position is “the figure 8”.
That’s right, just the very nightmare of all motorcyclists until a few years ago, when they still required it in the A license test. But how can you make a figure 8 less difficult and unpleasant? Simple, make it wider! Move the two cones away (or helmets, backpacks, whatever you want to use) until you find a distance where the exercise is easy for you.
I told you, we start with something we can already do. At this point, let’s try to do it in our enduro position. The setting of the lower part of the body is the same, but we will balance the bike with the upper-body on the outside. Try it.
And now… try to do it slower. Get familiar with your balance, feel how much this position helps you keep your bike up.
The trick is to turn your head a lot, looking for a distant point as if you were going around in a circle. And keep a light grip on the handlebars.
Try to play with the weight and press differently on the inner and outer footpeg to understand the effect on the bike when cornering. Play with it, gain confidence.
When you feel confident again with the figure 8 , you can gradually bring the two cones closer and try to do it as narrow as you can. There’s no rush, but you need to practice. Pay attention to the difference between left and right corners: on the right, the accelerator will make you block your elbow and turn wider: focus and relax the right elbow.
A second useful exercise is a low-speed slalom, just like the one required for the A license exam.
You decide the distance between the cones and again I recommend: start easy.
Move between one cone and another using the enduro position to keep the bike in balance.
Practice and play with your bike, until you feel like bringing the cones closer together.
Focus on your feelings and breathe regularly.
In this case, the trick is to look half a meter sideways with respect to the cone, in advance.
If you end up against a cone it is because you have looked at it: don’t look at the cones, look next to the cones.
In these exercises, the slower you turn the more skillful you should be: gradually train yourself to find balance at a low speed.Use your legs.
VALUABLE ALLY: THE REAR BRAKE
Have you practiced? Now let’s add another useful tip. The rear brake is a fantastic ally at the entrance of almost every corner, because it allows us to adjust the speed slightly without interfering with the bike set-up, thus removing weight from the front instead of overloading it.
As I explained in the article on the medium-fast corner, the rear brake can be used continuously from before entering the corner, until even after accelerating.
We must get used to managing it like all controls, that is, not like a 1/0 switch but gradually. If you are not confident with the brakes on your motorcycle, I invite you to read my article on braking. Until you know how much it brakes, how gradually it does it, if it tends to block the rear or the front, you won’t really know your bike and you’ll have a hard time trusting it.
When cornering, the rear brake keeps the bike in good shape and offers the great advantage of constantly adjusting the speed in a much more refined way than the accelerator.
Acceleration can be more abrupt, if we realize that the speed is not the right one, while releasing the rear brake is “less” traumatic for the motorcycle set-up. And we can gradually keep a higher travel speed, if we get used to the correct cornering position and the use of the rear brake. We could reach the apex (the point where the bike is closest to the inside of the corner) when we are still braking, and start rotating the accelerator from the holding position until the real acceleration, and only when we are sure that the exit trajectory will be perfect, leave the brake behind and be “propelled” forward. It’s so much fun! Casey Stoner used to do it this way, accelerating hard when the rear brake was still active and then releasing it.
In this way, not only did he go fast, but he was able to adjust his cornering speed perfectly and get out with the engine already in motion. But I am mind-wandering.
Add the rear brake to your practice then!
THE FUNDAMENTAL ROLE OF SIGHT
I have already told you about it but let’s review this fundamental aspect.
In each turn, the phases are:
Our objective, first mental and then visual, is to anticipate these phases.
IMPORTANT: with my eyes I need to predict the entire size of the motorcycle, in short, I need to predict that at the time of the maximum leaning motorcycle+rider as a whole are within the right lane. If necessary, I stay on the side of the road longer before leaning.
Frequent errors in using sight:
Remember once again: the motorcycle goes where the rider looks. Even on the ground!
Remember: sometimes in hairpin bends with a difference in height, you will have to turn your head at an almost unnatural angle to look for the exit of the curve. But that’s right, do it! You’ll see the difference.
FINALLY, HOW DOES THE ACCELERATOR HELP US?
Acceleration is the other factor that helps us keep the bike in balance.
I wrote before about “retaining the accelerator”: what does it mean?
The entry point normally takes place with no acceleration, unless the corner is so smooth as to make a slowdown unnecessary.
Then we enter the corner, in the point where the slowdown is over and we make the turn, and since today we are talking about slow corners, in this case we press our legs onto the bike and bring our upper-body outside while leaning. As soon as the bike is leant, we can gently open the throttle (a driving instructor I know used to say “let’s give it a milligram of throttle”). So we don’t accelerate, but we move the accelerator to the “retaining” position. Let’s do it immediately after leaning the bike, as soon as possible. We may even slow down with little acceleration, but that’s okay: the difference will be that the bike set-up will be immediately perfect, and even using the rear brake, with our legs well placed and our eyes up, we’ll have excellent control over the bike travel speed.
After that, once we have reached the maximum leaning point or apex (2), we will accelerate for real, always gradually. When shall we accelerate? As soon as possible. And how do we understand when? Looking up and looking for the corner exit (3). If we give perspective to our driving plan, the time to accelerate will immediately be easier to decide.
If we do all these actions correctly, our travel speed will increase, but first of all, our confidence and control over the bike will increase.
One more point about the accelerator: you might remember that in the article on the medium-fast turn, I insisted that it is good to push your upper-body and head inside the corner, thus keeping the bike more vertical and using less wheel. This way we can avoid unwanted drifts, or in any case they can be handled more easily.
In a slow corner it is exactly the opposite: the bike leans more, the upper-body is on the outside.
So when we accelerate, are we in danger? No, it’s all calculated. Low speed involves a lot of weight discharged at the bottom, so it takes a lot of energy (throttle/acceleration) to break this balance. It doesn’t happen unintentionally that the wheel slips (hardly even in the rain, if we use the enduro position). Moreover, this is the perfect position to control drifts, because we push a lot on the outer footpeg (which carries the weight on the back end of the bike).
Also, remember that we have the throttle, whether we accidentally accelerate too much, or if we are slightly down speed and the bike is wobbling. Relax your arms to be more sensitive to acceleration and be smooth on the throttle, so take the weight off those arms!
When the bike is slow, even if it is more leant, with the enduro position we are safe and we can accelerate. Always gradually, please, and decide with your eyes well before where you want the bike to go.
Practice in a parking lot to convert these concepts into real confidence.
SO WHAT TRAJECTORY SHOULD I TAKE IN THE HAIRPIN BENDS?
Let’s talk about a line to follow, although I invite you to be very cautious on this subject. If you have traveled by road, you will have seen that corners are all different. So there isn’t a line that can work for every corner, but there are some points to keep in mind.
I already gave you the pieces of the puzzle, but let’s put them back together:
CONCLUSIONS
So have we found a way of mastering hairpin bends? We absolutely have! I promised you that.
And have you understood why I couldn’t tell you about it before? That’s right, because there was so much stuff to understand before! As with those courses like ‘Learn Self-Defense in a Lesson’, you should have smelled a rat right away!
Instead, if you follow my advice, if you are in the middle of a hairpin bend and do a swift enduro leaning movement, you will be safe! Because you have already worked on your balance, on managing controls and on the use of your eyes and rear brakes. You won’t be caught unprepared.
In short, I have given you the tools to build your driving, without shortcuts, but if you follow the advice you will understand the reason for the movements you make on the seat and the mental processes and decisions you need to make. You will have the tools to solve the challenges on the road, on your own, instead of running like a machine.
And if you’re like me, you’ll have a lot of fun along the way to improve your driving, a journey that has absolutely no end!
Until next time, Misses!
Marcella Colombari